How to Add or Delete Images
Step 1:
In the navigation panel, click the option labeled “Media”

Step 2:
Under the Media tab, click the option labeled “Add New”

- Option 1 – drag and drop: images can easily be dragged and dropped into the media library and WordPress will automatically add the image
- Option 2 – select files: images can easily be selected within folders and uploaded to WordPress
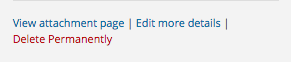
Deleting an Image:
Step 1:
Go to the Media Library and select the image to be deleted
Step 2:
Click the “Delete Permanently” link
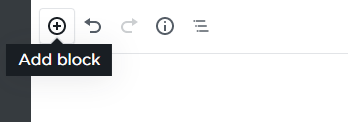
Adding an image to a page/post:
Step 1:
Click the “+” sign to Add block
- Option 1 – Located in the upper left side of the screen to the right of “Dashboard”
- Option 2 – Located on the left side of a new block option

Step 2:
Under the Add block tab, click on the “image” option
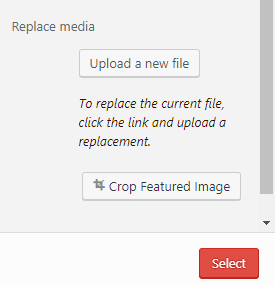
Step 3:
Click on Media Library and locate the image that needs to be added and click the red “select” button on the lower right.