
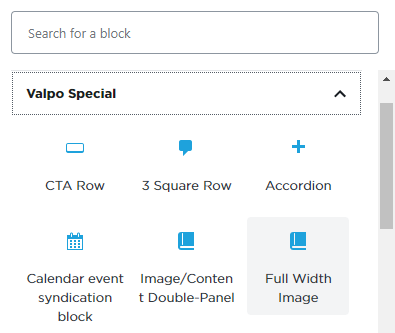
Full Width Image
Step 1:
Click on the box labeled “Full Width Image”
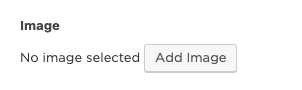
Step 2:
Click on the “Add Image” button, and upload the desired image (Large images recommended)
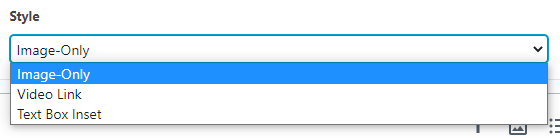
Step 3:
Under “Style”, click the dropdown arrow for the following options:
- Option 1: Image-Only
- Option 2: Video Link
- Option 3: Text Box Inset
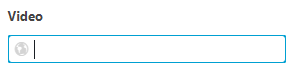
Video Link
Under “Video”, enter the destination URL of the video address
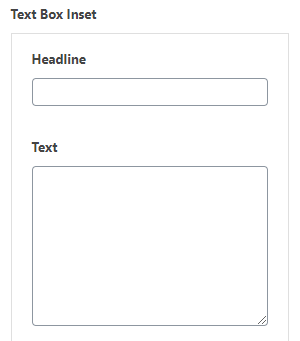
TEXT BOX INSET
Step 1:
Under “Text Box Inset”, enter the headline and body text
Step 2:
Under “Style”, keep Default as the primary option
Step 3:
Click the “Add Row” button, and then the “Select Link” button to enter the destination URL, and link text
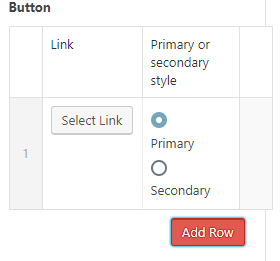
Step 4:
Choose between the Primary or Secondary style links
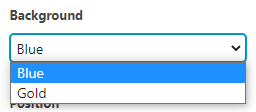
Step 5:
Under “Background”, choose one of the following options:
- Option 1: Blue
- Option 2: Gold
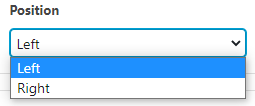
Step 6:
Under “Position”, click the dropdown arrow for the following options:
- Option 1 – Left
- Option 2 – Right
Examples

Headline
Body text